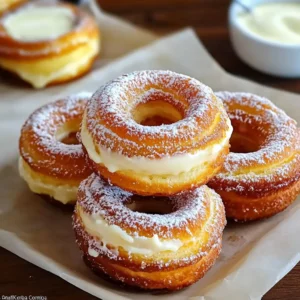
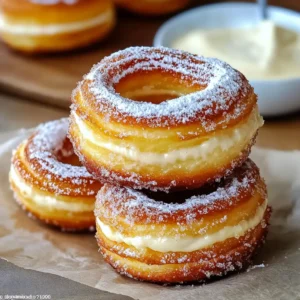
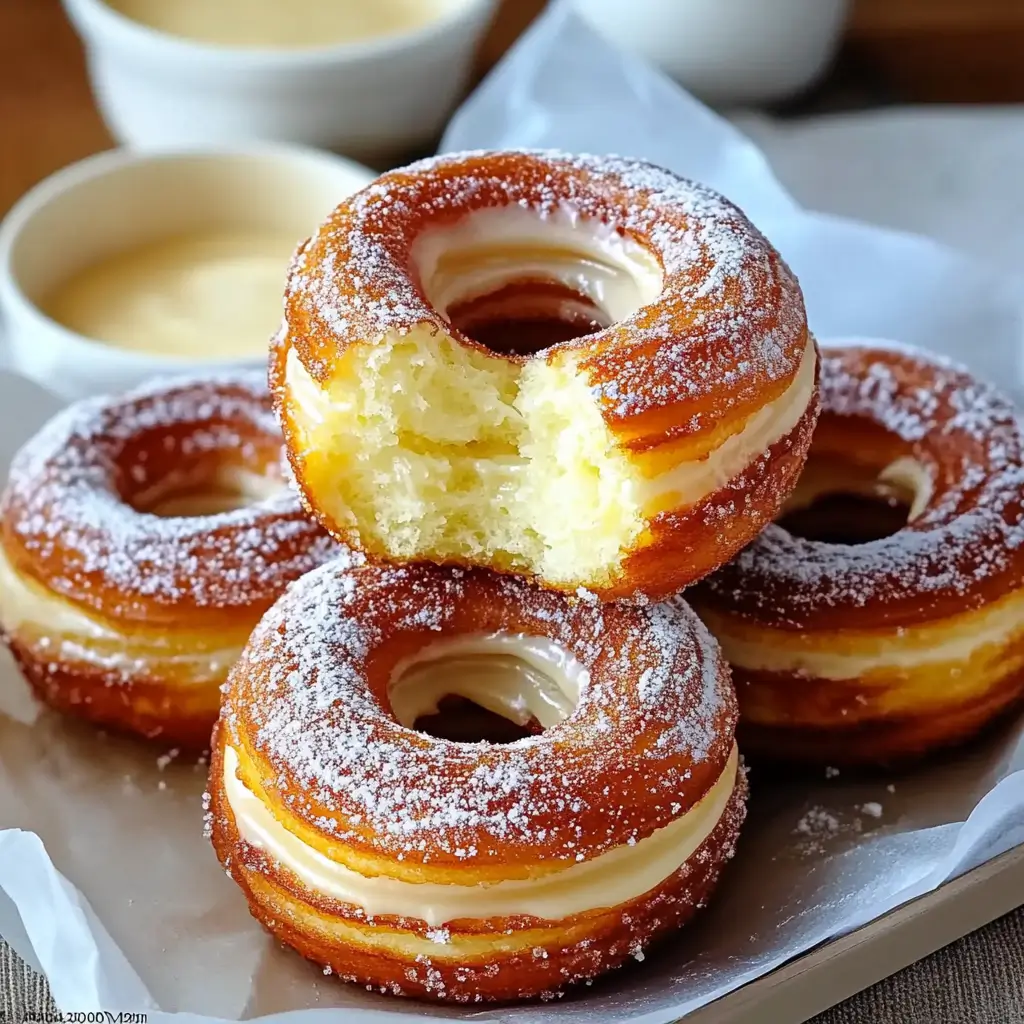
If you’ve ever dreamed of the perfect pastry, combining the flaky, buttery goodness of a croissant with the fried crispiness of a donut, then you’re probably familiar with cronuts. These delicious pastries have taken the world by storm, thanks to their rich flavor and unique texture. Originally created by Chef Dominique Ansel in New York City in 2013, cronuts have quickly become a must-try item in bakeries across the globe.
But what if you could make homemade cronuts right in your own kitchen? The idea might seem daunting at first, but with the right recipe, equipment, and a little patience, it’s completely achievable. In this guide, we’ll walk you through everything you need to know about making irresistible homemade cronuts from scratch. We’ll cover the history of cronuts, tips for perfecting your pastry-making skills, and provide a foolproof recipe to help you create flaky, golden cronuts that will rival any bakery.
What Are Cronuts?
At their core, cronuts are a unique hybrid of two beloved pastries: croissants and donuts. The concept behind cronuts was born when Chef Dominique Ansel, inspired by the idea of transforming a croissant into a fried donut, decided to deep fry croissant dough, creating a flaky, light pastry with the crispy texture of a donut.
The original cronut combines the buttery layers of croissant dough with the deep-fried crunch of a donut. Traditionally, the dough is filled with a sweet cream or fruit jam, then finished off with a glaze. But over the years, cronuts have evolved into a versatile treat, with various fillings, glazes, and toppings becoming common variations. From classic vanilla glaze to more adventurous flavor combinations like maple-bacon or chocolate-filled cronuts, there’s no end to the creativity you can explore when making these delicious pastries.

The Magic Behind Cronut Dough
Cronuts are made with laminated dough, the same type of dough used for croissants. Laminating dough involves folding butter into layers of dough to create thin sheets of butter and dough. When this dough is fried, the butter inside creates layers that puff up, giving the cronut its signature flakiness and delicate texture.
Why Make Homemade Cronuts?
Making homemade cronuts is an incredibly satisfying process. While it’s easy to buy cronuts from your local bakery, there’s something special about making them yourself. When you make your own cronuts, you control every element: the dough, the fillings, the glazes, and even the frying process. Homemade cronuts are also fresher, and you can experiment with flavor combinations to make them uniquely yours.
But most importantly, homemade cronuts taste amazing! The crispy, flaky layers paired with sweet fillings and glazes are the perfect combination. Making cronuts at home also allows you to get creative with fillings—whether it’s a simple pastry cream, a luscious fruit jam, or even a rich chocolate ganache. The possibilities are endless!
Essential Tools for Making Cronuts
To make homemade cronuts, you don’t need a fancy pastry school toolkit, but there are a few essential tools that will make the process smoother and ensure your cronuts turn out just right.
1. Rolling Pin
A rolling pin is crucial when it comes to rolling out the dough evenly. This tool helps you create the smooth, even layers of dough that are essential for perfect laminated dough. You can choose between a traditional wooden rolling pin or a marble one, which helps keep the dough cool during the rolling process.
2. Cronut Cutter
While you can use a donut cutter to shape your cronuts, having a cronut cutter (which consists of two concentric rings) will give your pastries the perfect shape. You can easily find cronut cutters online or at baking supply stores, and they’re designed to create the ideal size for cronuts.
3. Frying Thermometer
Maintaining the right temperature is crucial when deep-frying cronuts. If the oil is too hot, the cronuts will burn on the outside while remaining raw on the inside. If it’s too cool, the cronuts will absorb too much oil, leaving them greasy. A reliable frying thermometer will help you monitor the oil temperature to keep it around 350°F (175°C), which is perfect for frying.
4. Pastry Brush
A pastry brush is a must-have for spreading butter between layers of dough, giving your cronuts their signature flaky texture. It also comes in handy for glazing the cronuts once they’ve been fried.
5. Deep Fryer or Large Pot
While a deep fryer is ideal for making cronuts, a large pot will work just fine. Make sure the pot is deep enough to allow the cronuts to fry evenly. You’ll also need to keep an eye on the oil temperature to ensure the cronuts fry to perfection.
6. Pastry Bag
If you plan to fill your cronuts with a sweet cream, jam, or ganache, a pastry bag is incredibly helpful. You can use it to pipe fillings directly into the center of each cronut, creating that perfect combination of crispy exterior and gooey, flavorful filling.
The Ultimate Cronut Recipe
Now that we’ve covered the essential tools, let’s get into the heart of the matter: the irresistible homemade cronut recipe. Follow this step-by-step guide, and you’ll be well on your way to making delicious cronuts from scratch.

Ingredients for Cronut Dough:
- 2 cups all-purpose flour
- 1/4 cup granulated sugar
- 1 teaspoon salt
- 2 teaspoons active dry yeast
- 3/4 cup warm milk (about 110°F)
- 1/2 cup unsalted butter, softened
- 1 large egg
- 1/4 cup warm water (about 110°F)
- 1 tablespoon vanilla extract
- Vegetable oil for frying
For the Vanilla Glaze:
- 1 cup powdered sugar
- 2 tablespoons milk
- 1 teaspoon vanilla extract
- Pinch of salt
Optional Fillings:
- Pastry Cream: This smooth, creamy filling is the classic choice for cronuts.
- Fruit Jam: You can use raspberry, strawberry, or any fruit jam you like for a tangy sweetness.
- Chocolate Ganache: Melted chocolate combined with cream makes for a rich, indulgent filling.
Instructions:
Step 1: Activate the Yeast
To get started, dissolve the yeast in warm water with a pinch of sugar. Stir the mixture and let it sit for about 5–10 minutes until it becomes frothy. This step ensures that the yeast is alive and ready to work its magic in the dough.
Step 2: Mix the Dough Ingredients
In a separate large bowl, combine the flour, sugar, and salt. Once mixed, add the activated yeast mixture, warm milk, egg, and vanilla extract. Stir everything together until a rough dough forms.
Step 3: Knead the Dough
Turn the dough out onto a lightly floured surface and knead for about 10 minutes until it’s smooth and elastic. Kneading helps to develop the gluten in the dough, giving it the structure needed to hold the buttery layers.
Step 4: Let It Rise
Place the dough in a lightly oiled bowl, cover it with a clean cloth, and let it rise in a warm place for 1 hour, or until it has doubled in size. This step is important for creating a light, airy texture in your cronuts.
Step 5: Roll Out the Dough and Fold in the Butter
After the dough has risen, punch it down to release any air bubbles. Roll the dough into a rectangle about 1/2 inch thick. Spread a thin layer of softened butter over the entire surface of the dough. Then, fold the dough into thirds, like a letter, and roll it out again. Repeat this folding and rolling process two more times to create those signature flaky layers.
Step 6: Chill the Dough
Wrap the dough in plastic wrap and refrigerate it for at least 30 minutes. Chilling the dough helps the butter firm up and prevents it from melting during frying, ensuring that the layers remain intact.
Step 7: Shape the Cronuts
After chilling, roll the dough out again into a 1/2-inch thick rectangle. Use a cronut cutter (or a donut cutter) to cut out the shapes. You’ll need one large cutter for the outer edge and a smaller one for the center hole.
Step 8: Let the Cronuts Rest
Place the cut cronuts on a parchment-lined baking sheet, cover them with a cloth, and let them rest for about 15–20 minutes. This resting time allows the dough to relax and puff up during frying.
Step 9: Fry the Cronuts
Heat the vegetable oil in a deep fryer or large pot to 350°F. Carefully lower the cronuts into the hot oil, frying them for 2–3 minutes on each side or until golden brown. Frying them at the right temperature ensures a crispy exterior while keeping the inside light and fluffy.
Step 10: Glaze and Fill the Cronuts
Once the cronuts are fried, use a pastry brush to remove excess oil and then dip them into a simple vanilla glaze. For a more indulgent treat, you can also fill the cronuts with a pastry cream or fruit jam. Use a piping bag to inject the filling into the center of the cronuts before glazing them.
Variations and Flavor Ideas
While the traditional vanilla glaze is always a hit, there are many ways to customize your homemade cronuts with different fillings and toppings. Here are some ideas to inspire your next batch:
1. Maple Bacon Cronuts
For a savory twist, try adding crispy bacon and a maple glaze. The salty bacon pairs perfectly with the sweet, sticky maple glaze, giving your cronuts a sweet-and-salty balance that’s truly irresistible.
2. Lemon Curd Cronuts
Lemon curd adds a refreshing tartness that cuts through the richness of the buttery dough. Simply pipe a generous amount of lemon curd into the center of each cronut and drizzle with a lemon glaze for an extra zing.
3. Chocolate Hazelnut Cronuts
If you’re a fan of Nutella or chocolate hazelnut spread, this filling is a game-changer. Fill the cronuts with chocolate hazelnut spread and top with a dusting of powdered sugar for a decadent treat.
4. Strawberry Jam Cronuts
For a fruity filling, use strawberry or raspberry jam to add a burst of flavor inside the cronuts. You can even add fresh berries for an extra layer of sweetness.
5. Caramel Cronuts
If you love the rich flavor of caramel, try filling your cronuts with homemade caramel sauce and glazing them with a buttery caramel glaze for a truly indulgent pastry experience.
Final Thoughts
Making homemade cronuts is a fun, rewarding, and incredibly delicious way to show off your baking skills. While it may seem challenging at first, the process is straightforward if you follow the steps carefully. Once you master the basic dough and frying technique, you can get creative with different fillings, glazes, and toppings to customize your cronuts to your liking.
These pastries are perfect for breakfast, brunch, or as a decadent dessert. Whether you stick with the classic vanilla glaze or experiment with flavors like chocolate or maple-bacon, homemade cronuts are sure to impress. Don’t forget to share your creations with friends and family – they’ll be amazed at your baking abilities!
If you enjoyed making cronuts, why not try other delicious pastries or desserts next? Consider checking out more of our recipes for baked goods and sweet treats to add to your repertoire.
Print
Irresistible Homemade Cronuts
- Total Time: 2 hour 15 minutes
- Yield: 12 cronuts 1x
Description
This homemade cronut recipe uses laminated dough (the same dough used for croissants), deep-fried to crispy perfection and finished off with a sweet glaze. Filled with creamy pastry cream, fruit jam, or even a rich chocolate ganache, these homemade cronuts are sure to impress your family and friends. Whether you’re a beginner or an experienced baker, this guide will walk you through the process step by step, ensuring your cronuts turn out perfect every time.
Ingredients
For the Cronut Dough:
- 2 cups all-purpose flour
- 1/4 cup granulated sugar
- 1 teaspoon salt
- 2 teaspoons active dry yeast
- 3/4 cup warm milk (about 110°F or 43°C)
- 1/2 cup unsalted butter, softened (for dough)
- 1 large egg
- 1/4 cup warm water (about 110°F or 43°C)
- 1 tablespoon vanilla extract
- Vegetable oil (for frying)
For the Vanilla Glaze:
- 1 cup powdered sugar
- 2 tablespoons milk
- 1 teaspoon vanilla extract
- Pinch of salt
Optional Fillings (choose one or more):
- Pastry cream (for a classic filling)
- Fruit jam (e.g., strawberry, raspberry, or blueberry)
- Chocolate ganache (for a rich, indulgent filling)
Instructions
In a small bowl, dissolve the active dry yeast in 1/4 cup warm water along with a pinch of sugar. Stir well and allow the mixture to sit for 5–10 minutes until it becomes frothy. This step is crucial as it activates the yeast, which will help the dough rise.
In a large mixing bowl, whisk together 2 cups of all-purpose flour, 1/4 cup sugar, and 1 teaspoon salt. Once the dry ingredients are well combined, add the yeast mixture, warm milk, 1 egg, and 1 tablespoon vanilla extract. Mix the ingredients together until a rough dough forms.
Turn the dough out onto a lightly floured surface and knead for about 10 minutes, or until the dough is smooth and elastic. This process will develop the gluten in the dough, which helps give the cronut its chewy and flaky texture.
Place the dough in a lightly oiled bowl and cover it with a clean kitchen towel. Let it rise in a warm, draft-free area for about 1 hour or until it doubles in size.
Once the dough has risen, punch it down to release the air. Roll the dough out into a large rectangle, approximately 1/2 inch thick. Spread a thin layer of softened butter (about 1/2 cup) evenly over the dough.
Fold the dough into thirds, like a letter, then roll it out again to a similar thickness. Repeat this buttering and folding process 2 more times. This technique, known as lamination, creates the flaky layers of the cronut.
Wrap the dough in plastic wrap and refrigerate it for at least 30 minutes. Chilling the dough is important because it solidifies the butter layers and helps prevent the butter from melting during frying, keeping the layers intact.
After the dough has chilled, roll it out one more time to a thickness of about 1/2 inch. Use a cronut cutter (or two ring cutters) to cut out donut shapes. You’ll need one large cutter for the outer edge and a smaller cutter for the hole in the center.
Place the shaped cronuts on a parchment-lined baking sheet. Cover them with a cloth and let them rest for about 15–20 minutes. This resting time allows the dough to relax and puff up during frying.
Heat vegetable oil in a deep fryer or large pot to 350°F (175°C). Carefully place the cronuts into the hot oil, frying a few at a time. Fry them for about 2–3 minutes on each side, or until they are golden brown and crispy. Be sure to keep an eye on the oil temperature to ensure the cronuts fry evenly.
Use tongs or a slotted spoon to remove the cronuts from the oil and place them on paper towels to drain any excess oil. Once they’ve cooled slightly, dip them into the vanilla glaze or drizzle the glaze over the cronuts. For the glaze, simply whisk together 1 cup powdered sugar, 2 tablespoons milk, 1 teaspoon vanilla extract, and a pinch of salt until smooth.
If you’re using a filling, you can fill the cronuts with pastry cream, fruit jam, or chocolate ganache. Use a pastry bag to pipe the filling into the center of each cronut. This step adds an extra layer of sweetness and richness to the cronut.
Notes
1. Dough Lamination: The key to a flaky cronut lies in the lamination process. Be sure to fold and roll the dough at least three times to create those perfect layers. Don’t rush this step!
2. Oil Temperature: Keep a close eye on the temperature of the frying oil. If the oil is too hot, the cronuts will burn on the outside while remaining raw on the inside. If it’s too cool, they will absorb too much oil and become greasy. A thermometer is essential for this step.
3. Resting Time: Don’t skip the resting time after cutting out the cronuts. Allowing the dough to rest helps the layers set and puffs them up during frying.
4. Chill the Dough: After each step of rolling and folding the dough, it’s important to chill it for at least 30 minutes. This makes the dough easier to handle and keeps the butter solidified, ensuring a crisp, flaky texture.
5. Fillings: You can get creative with the fillings! Classic options include pastry cream, fruit jams, and chocolate ganache, but feel free to experiment with other flavors such as lemon curd, maple syrup, or even a whipped cream filling.
6. Filling the Cronuts: If you prefer a more structured filling, you can use a piping bag to inject the filling into the cronuts after they’ve been fried and glazed. Alternatively, you can simply drizzle the glaze over the top for a lighter option.
- Prep Time: 1 hour 30 minutes
- Cook Time: 15 minutes
- Category: Dessert
- Cuisine: French-American Fusion
Nutrition
- Calories: 320 kcal
- Sugar: 14g
- Sodium: 60mg
- Fat: 16g
- Saturated Fat: 9g
- Carbohydrates: 40g
- Fiber: 1g
- Protein: 4g
- Cholesterol: 45mg

